DIY Li-Ion Battery Packs with Spot Welder Demonstration
DIY Li-Ion Battery Packs with Spot Welder Demonstration
Session Date: August 15, 2025
Duration: 9m 43s
Venue: YouTube Video Tutorial
Speakers: CJ Davies
Link: YouTube Video
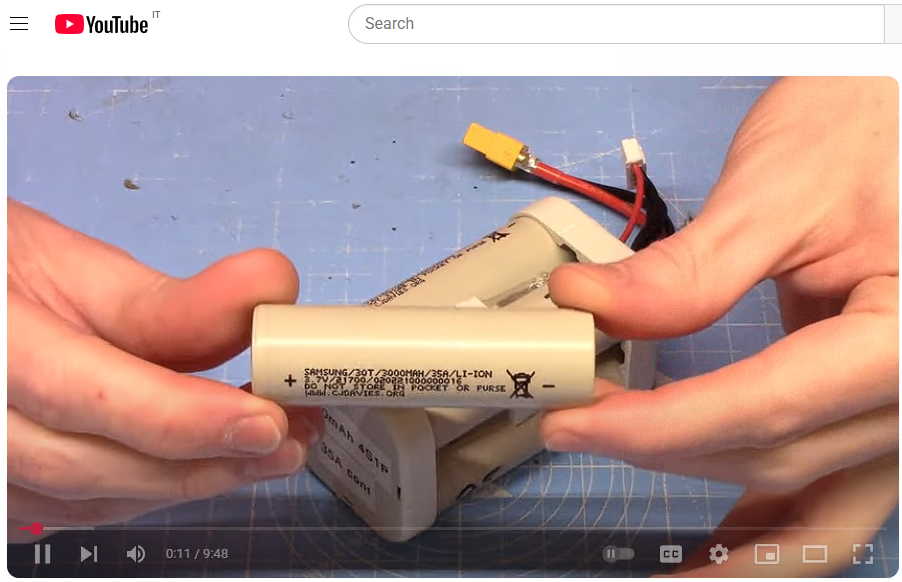
Table of Contents
- Introduction and Project Overview
- Materials and Equipment
- Battery Pack Assembly Process
- Wiring and Electrical Connections
- Testing and Quality Assurance
- Future Applications and Scalability
- References
1. Introduction and Project Overview
Timeframe: 00:00:00 - 00:01:43
Duration: 1m 43s
Speakers: CJ Davies
This session demonstrates the construction of custom lithium-ion battery packs using a spot welding technique.
The presenter showcases building a 4S 1P (4 cells in Series, 1 Parallel) pack configuration using Samsung INR21700-30T cells.
The project emphasizes the importance of proper safety procedures when working with lithium-ion cells and demonstrates professional-grade assembly techniques using specialized equipment.
The demonstration focuses on creating flight packs for drone applications, with specific attention to maintaining electrical integrity through proper welding techniques and balance wire implementation.
2. Materials and Equipment
Timeframe: 00:00:04 - 00:01:08
Duration: 1m 4s
Speakers: CJ Davies
2.1 Battery Cells Specification
The project utilizes Samsung INR21700-30T cells, which are high-performance lithium-ion batteries specifically designed for high-drain applications.
These cells feature:
- 21700 form factor (21mm diameter, 70mm length)
- 3000mAh capacity
- High discharge rate capability
- Excellent thermal characteristics
2.2 Spot Welder Configuration
Equipment: Sequre SQ-SW1 Spot Welder (also marketed as Flipsky FS-SW1) Settings: 40ms pulse duration with 20% preheat Power Source: Turnigy Rapid 5500mAh 3S2P 140C hardcase LiPo battery
2.3 Tools and Accessories
- 0.2mm pure nickel strip (not nickel-plated steel)
- 3D printed end caps and spacers
- Dremel tool for slot cutting
- Hot glue gun for temporary assembly
- Soldering iron and solder
- Balance connector wires
- XT60 discharge connector
3. Battery Pack Assembly Process
Timeframe: 00:01:03 - 00:04:00
Duration: 2m 57s
Speakers: CJ Davies
3.1 Nickel Strip Preparation
Timeframe: 00:01:03 - 00:01:26
Duration: 23s
Speakers: CJ Davies
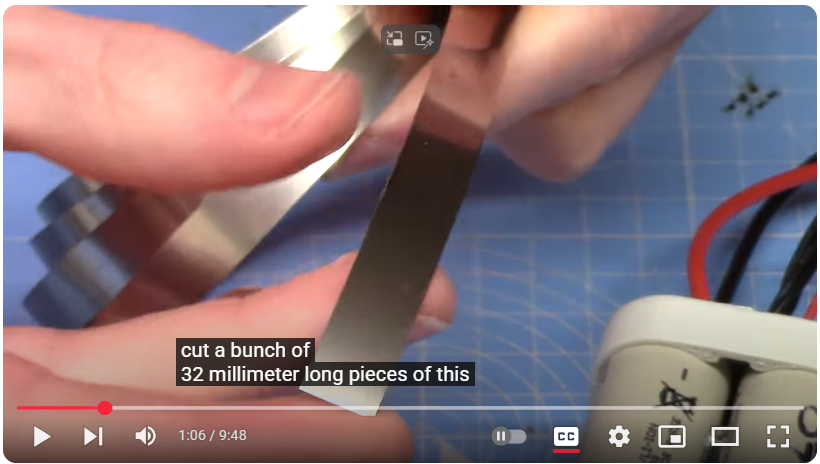
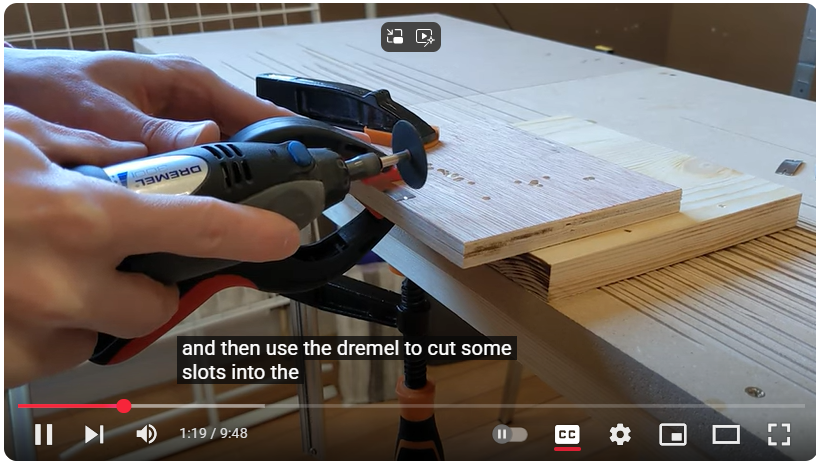
The preparation process involves cutting 32mm long pieces of 0.2mm pure nickel strip and creating slots at the ends using a Dremel tool.
These slots serve a critical purpose: they encourage electrical current from the spot welder electrodes to travel into the cell terminals rather than just through the nickel strip surface, ensuring proper weld penetration and connection integrity.
3.2 Cell Arrangement and Connection
Timeframe: 00:01:28 - 00:01:56
Duration: 28s
Speakers: CJ Davies
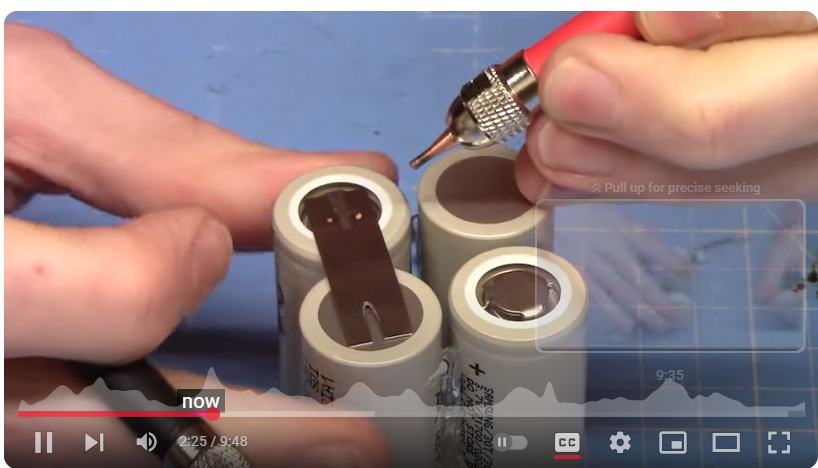
The cells are arranged in a linear configuration for series connection. Hot glue is applied along the sides to temporarily hold the cells in position during the welding process.
The presenter notes that this temporary adhesive will likely be replaced with heat shrink tubing in the final assembly.
3.3 Series Connection Welding
Timeframe: 00:02:01 - 00:04:00
Duration: 1m 59s
Speakers: CJ Davies
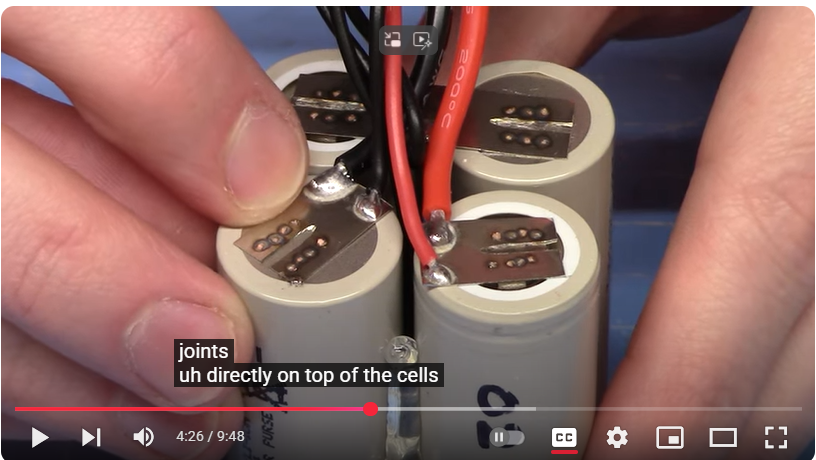
The spot welding process connects:
- Negative terminal of cell 1 to positive terminal of cell 2
- Negative terminal of cell 3 to positive terminal of cell 4
Three pairs of welds are applied to each connection point to ensure mechanical strength and electrical conductivity. The presenter emphasizes the importance of maintaining electrode sharpness, as the welding tips wear down and develop flat ends that can compromise weld quality.
4. Wiring and Electrical Connections
Timeframe: 00:04:04 - 00:08:46
Duration: 4m 42s
Speakers: CJ Davies
4.1 Discharge Wire Installation
Timeframe: 00:04:10 - 00:05:57
Duration: 1m 47s
Speakers: CJ Davies
The thicker discharge wires are pre-soldered to nickel strip tabs before spot welding to the pack.
This approach prevents direct soldering on cell terminals, which would negate the benefits of spot welding.
The discharge connections require four spot welds per connection due to the higher mechanical stress they experience during use.
4.2 Balance Connector Wiring
Timeframe: 00:06:01 - 00:07:50
Duration: 1m 49s
Speakers: CJ Davies
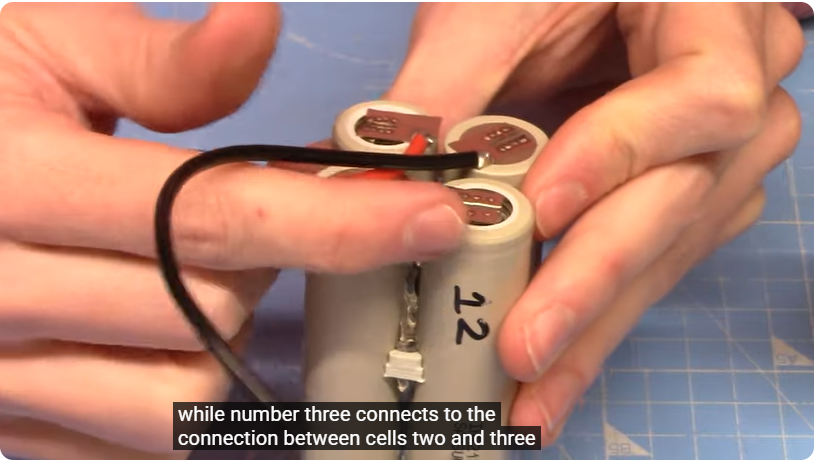
The balance connector implementation follows a specific wiring scheme:
- Wires 1 and 5: Connect to discharge terminals (first and last cells)
- Wire 2: Connects to the bridge between cells 1 and 2
- Wire 3: Connects to the bridge between cells 2 and 3
- Wire 4: Connects to the bridge between cells 3 and 4
These connections are made with smaller gauge wire and require minimal soldering, reducing heat exposure to the cells.
4.3 Final Connector Assembly
Timeframe: 00:08:12 - 00:08:46
Duration: 34s
Speakers: CJ Davies
The XT60 connector is attached to complete the discharge circuit. This connector type is chosen for its high current capacity and secure connection mechanism, making it ideal for high-drain applications like drone flight packs.
5. Testing and Quality Assurance
Timeframe: 00:07:54 - 00:08:12
Duration: 18s
Speakers: CJ Davies
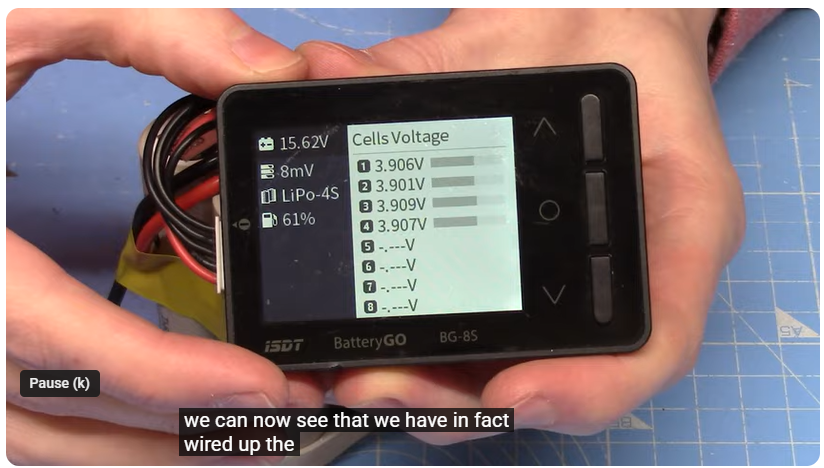
The functionality verification involves checking the balance connector readings. Proper wiring is confirmed when individual cell voltages are displayed correctly. Incorrect wiring would result in bizarre readings or error messages from the charging equipment.
6. Future Applications and Scalability
Timeframe: 00:08:48 - 00:09:43
Duration: 55s
Speakers: CJ Davies
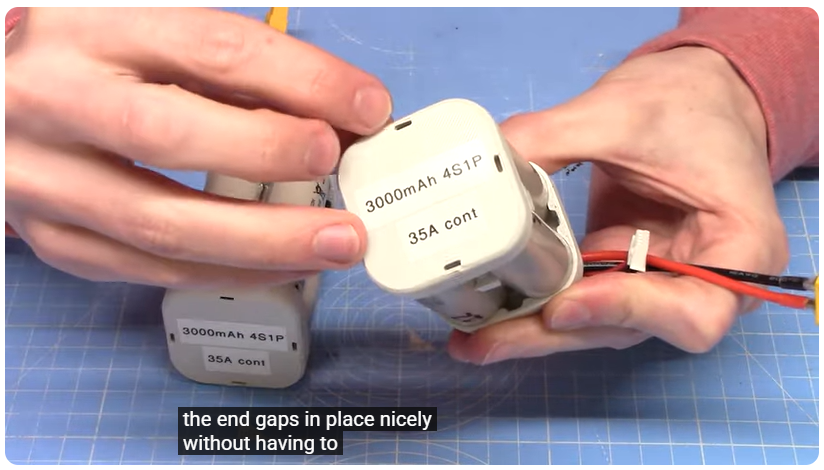
The presenter outlines plans for building multiple pack configurations:
- Individual 4S 1P packs: For 6-7 inch quadcopter applications
- 4S 2P configuration: Stacking two packs for macro quad builds
- 6S packs: Using remaining cells for 5-inch quad applications
The scalability demonstrates the versatility of the spot welding technique for various drone power requirements.
References
Technical Resources
Samsung INR21700-30T Battery Review
Technical Analysis on lygte-info.dk
Comprehensive technical analysis of the Samsung 30T cells used in this project. This resource provides detailed performance characteristics, discharge curves, and safety ratings essential for understanding the capabilities and limitations of these high-performance lithium-ion cells.Thingiverse 3D Printable Battery Holders
3D Models Repository
Repository of 3D printable designs for battery pack end caps and spacers. These designs provide mechanical protection and structural integrity for custom battery packs. The platform offers various configurations that can be scaled to accommodate different cell sizes.
Safety and Best Practices
Lithium-Ion Battery Safety Guidelines
Essential reading for anyone working with lithium-ion cells. Covers proper handling, charging protocols, thermal management, and emergency procedures. Understanding these safety principles is critical before attempting any battery pack construction.Spot Welding Techniques for Battery Assembly
Technical documentation on proper spot welding parameters, electrode maintenance, and quality control procedures. This knowledge ensures reliable electrical connections and mechanical integrity in battery pack construction.
Equipment Specifications
- Sequre SQ-SW1/Flipsky FS-SW1 Spot Welder Manual
Operating instructions and technical specifications for the spot welder used in this demonstration. Includes parameter settings for different materials and safety protocols for operation.
Disclaimer: Lithium-ion batteries are potentially dangerous if mishandled. This documentation is for educational purposes only. Always consult professional resources and follow proper safety protocols when working with battery systems.