🌐 HowTo: Expose My Computer with No-IP DDNS
Complete guide to making your home computer accessible from anywhere using No-IP Dynamic DNS service
Dynamic DNS (DDNS) is a great way to make your home computer accessible from anywhere, even if your ISP gives you a dynamic public IP.
No-IP provides a free and reliable DDNS service. This guide walks you through the entire process.
📋 Table of Contents
- Create a No-IP Account and Hostname
- Install the No-IP DUC (Dynamic Update Client)
- Configure the DUC
- Special Notes on Credentials
- Verify the Setup
- Configure Port Forwarding
- Secure Your Setup
- Test IP Change Handling
- Key Lessons Learned
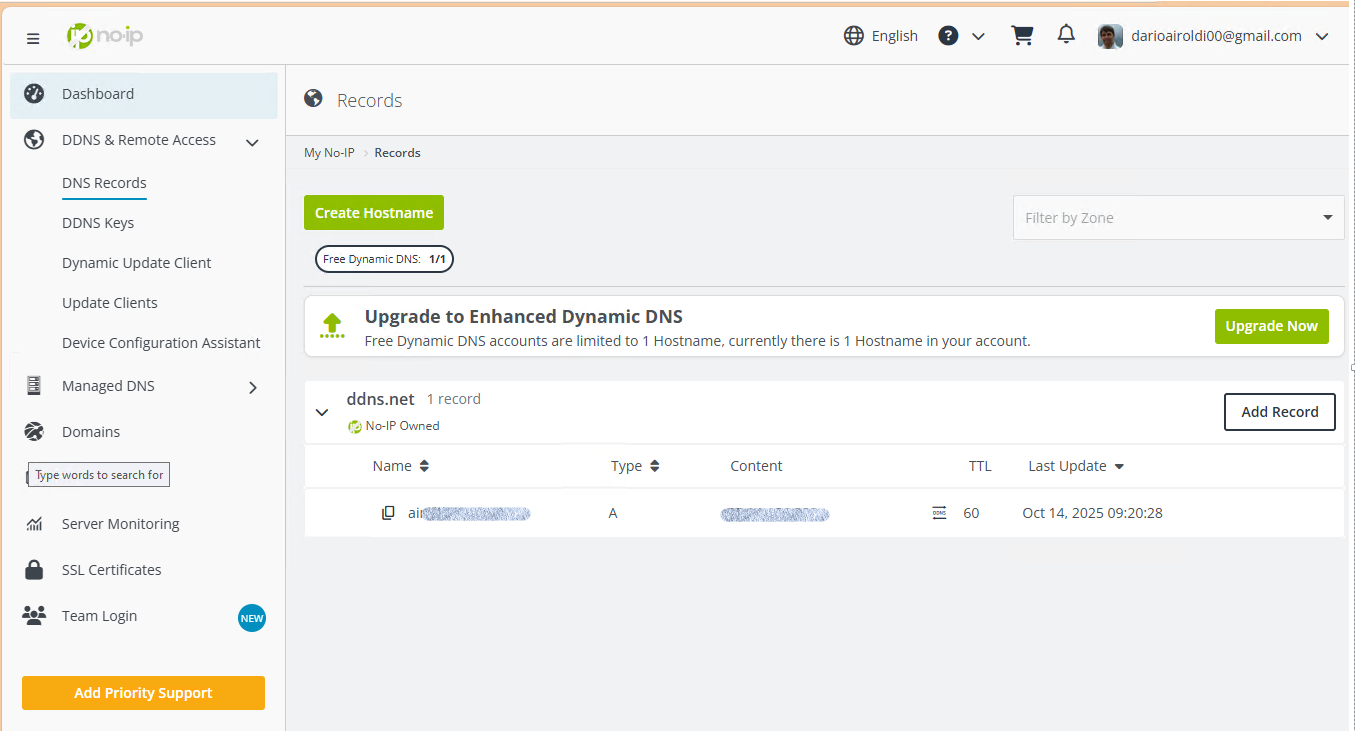
✅ 1. Create a No-IP Account and Hostname
- Go to No-IP for a free account.
- Create a hostname (e.g.,
myhost.ddns.net). - Confirm your email and activate the hostname.
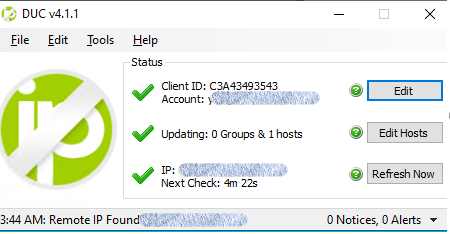
✅ 2. Install the No-IP DUC (Dynamic Update Client)
The DUC keeps your hostname updated with your current public IP.
- Download: No-IP DUC Download and install the client on your computer.
- During setup:
- Log in with your No-IP credentials (or DDNS Key if configured).
- Select the hostname you created.
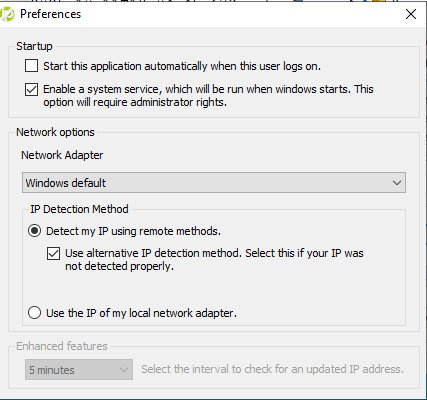
✅ 3. Configure the DUC
- Open Preferences:
- Enable Run as a system service (recommended for 24/7 updates).
- Default update interval: 5 minutes.
- IP detection: Use remote methods (default).
✅ 4. Special Notes on Credentials
- If you signed up with Google, you must set a No-IP password via the password reset link.
- Alternatively, you can use DDNS Key credentials, but they only work on the same Windows account where configured.
✅ 5. Verify the Setup
Check the DUC dashboard: Green check marks mean it’s working.
On No-IP dashboard: Your hostname should show your current public IP.
Test from an external network:
ping myhost.ddns.netor use
bash nslookup myhost.ddns.net
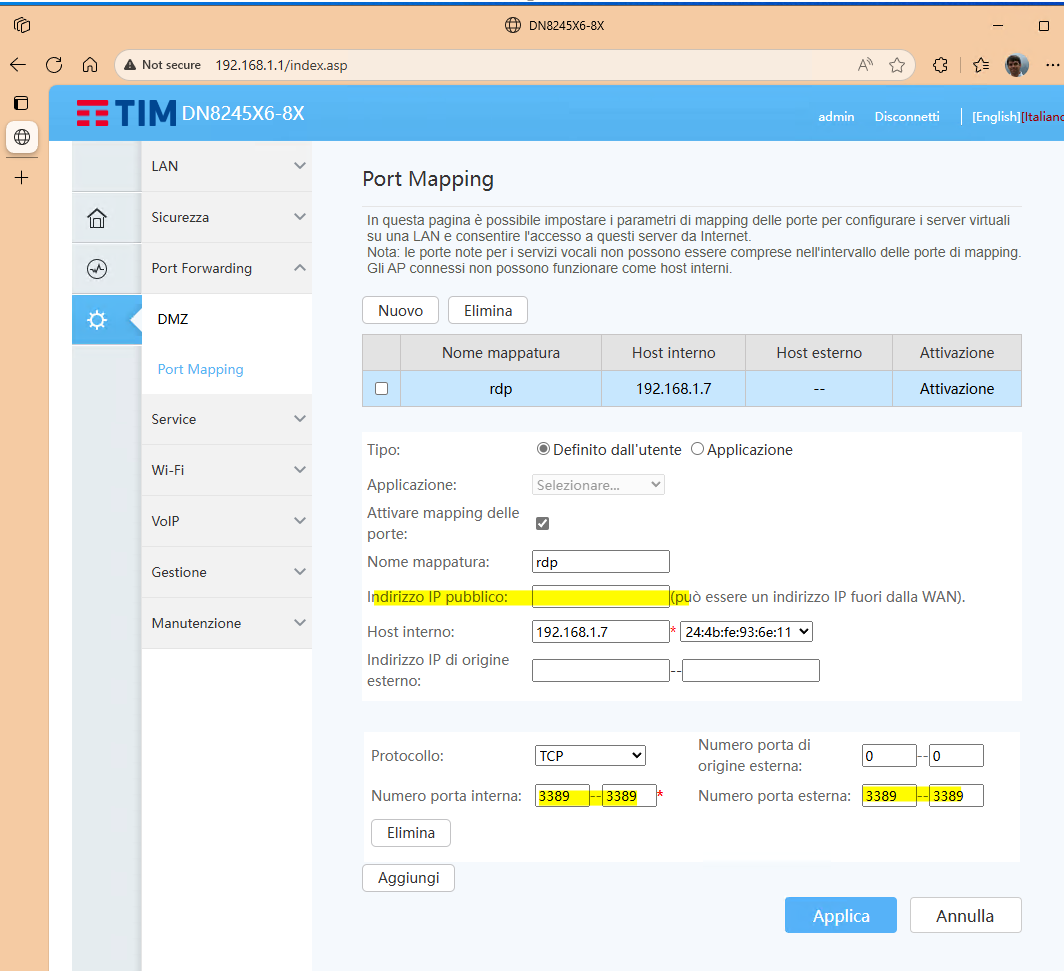
✅ 6. Configure Port Forwarding
To access services (RDP, SSH, web server):
- Log in to your router.
- Forward the required ports to your computer’s local IP:
- RDP: TCP 3389
- SSH: TCP 22
- Custom apps: Define as needed.
🔒 7. Secure Your Setup
- Use strong passwords for remote services.
- Enable firewall rules to restrict access.
- Consider using a VPN for safer remote access.
🧪 8. Test IP Change Handling
Restart your router or use:
ipconfig /release
ipconfig /renew
Confirm that:
DUC updates the IP within 5 minutes. Hostname resolves to the new IP.
💡 Key Lessons Learned
- Free plan allows 1 hostname, requires monthly confirmation.
- DUC as a service ensures updates even without user login.
- DUC credentials must be entered always from the same user.